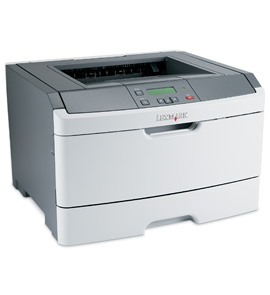
Lexmark E360dn 935.10 Printhead Error
Problem
Error: " 930 "; Error: " 931 "; Error: " 932 "; Error: " 933 "; Error: " 934 "; Error: " 935 "; 931.00 Printhead error; 931.01 Printhead error; 932.00 Printhead error; 932.01 Printhead error; 933.00 Printhead error; 935.10 Printhead error; 935.11 Printhead error; 935.12 Printhead error; 935.13 Printhead error; 935.14 Printhead error; 935.15 Printhead error; 935.16 Printhead error; 935.17 Printhead error; 935.18 Printhead error; 935.19 Printhead error; 935.20 Printhead error; 935.21 Printhead error; 935.22 Printhead error; 935.23 Printhead error; 935.24 Printhead error; 935.25 Printhead error; 935.26 Printhead error; 93x Printhead errors; 930.xx errors; 931.xx errors; 932.xx errors; 933.xx errors; 934.xx errors; 935.xx errors; All lights flashing; Error light on
Solution
What the error means
Clear the error
Check the power source the printer is plugged into
If the error continues
A Printhead Error message indicates that the printhead (laser scanner) unit inside the printer is not working correctly.
NOTE: On the E250d(n) models, all service errors are signified by the flashing of all of the lights. To determine if this is a printhead error, quickly double-press thebutton to see the secondary code. If the !,
, and
lights are the only ones blinking, a printhead or a motor failure is indicated. For more information on deciphering the error lights, click here (PDF file, 255KB).
Clear the error
Step Action 1 If this is the first time you have seen the error, turn the printer off. 2 Leave the printer powered off for 10 seconds or more before turning it back on. This gives the printer a chance to reset. 3
Power the printer back on. If it goes to the Ready state, try printing again. If the error does not return, continue using the printer.4
If the printhead error returns when the printer is powered on or when you try to print again, follow the suggestions below.
Check the power source the printer is plugged into
If this is an intermittent error, you may want to check how the printer is plugged into the wall.
Make sure the printer is plugged straight into the wall and not through a surge device or power strip. Please try this even if the printer previously worked correctly with this surge device. Power strips and uninterrupted power supplies can cause a low amperage problem, which can trigger a false printhead error.
You may also want to try plugging the printer into a different wall outlet to see if the printhead error continues. This will eliminate the power source as a possible cause of the issue.
If the error continues
If the error does not clear, the printer will probably require service to correct the issue. Please contact Lexmark Technical Support or a local authorized servicer for assistance.
When calling Lexmark Technical Support for service, please be prepared to describe the problem you are experiencing or the error message on the display. You will also need to provide your printer's model type and serial number. This information can be found on a label on the inside of the front cover of the printer.
Please call from near the printer in case the technician asks you to perform a task involving the printer.


